At this point, you have registered a domain name and have also purchased the web hosting for your food blog. You can register your domain name while purchasing the web hosting from HostGator or Bluehost for ease of management.
Personally, I register domains from GoDaddy, but don’t use their hosting as it isn’t the best. I use web hosting from Hostgator & Bluehost. So, all my newly registered domains need to be configured so that they point to my web hosting server.
If you are just beginning and do not have an existing web hosting space, you will be taking action in either of the following manners.
A) Register Domain & Hosting Simultaneously
- Purchase web hosting from HostGator or BlueHost
- Register your desired domain name as the primary domain
- Your domain gets automatically configured to the hosting space
You can skip the rest of the guide as your domain and hosting are automatically synced when buying both from one company.
B) Register Domain & Hosting Separately
- Register domain from GoDaddy
- Purchase web hosting from HostGator or BlueHost with the registered domain name as the primary domain
- Log in to GoDaddy account and configure the domain Name Server details to the one provided by your hosting company
What is a Name Server?
Your domain’s name servers determine where your domain directs the visitors. Name servers point to the intended location of the website. This is the actual location of the website, which identifies the web hosting server location. All web hosting servers must have two name servers to ensure that the websites do not become unavailable due to name server issue.
Configuring the Name Server details of your domain
If you have purchased domain and hosting separately, you need to change the domain name server to that provided by your web hosting company.
Check the hosting welcome email received from your web hosting company. It will have the login details for cPanel, FTP (File Transfer Protocol, which allows you to upload or download files from server) as well as the Name Server (NS) details.
If you are using Bluehost, the name servers should be ns1.bluehost.com & ns2.bluehost.com. For Hostgator, you can find the name server information in the sidebar of your hosting control panel (cPanel).
- Login to Godaddy with your credentials.
- Browse to the domain management page (Manage My Domains) in the dashboard. You can find the menu link by clicking at your Name link at the top right corner of the page.

- Now, you will be taken to the page with the list of domains in your account. As you are just beginning, it should have just one domain listed.
- Click on the domain name to open up the domain management panel.
- You will now be taken to a page with lost of settings to configure. Look for NameServers section and click on the Manage link.
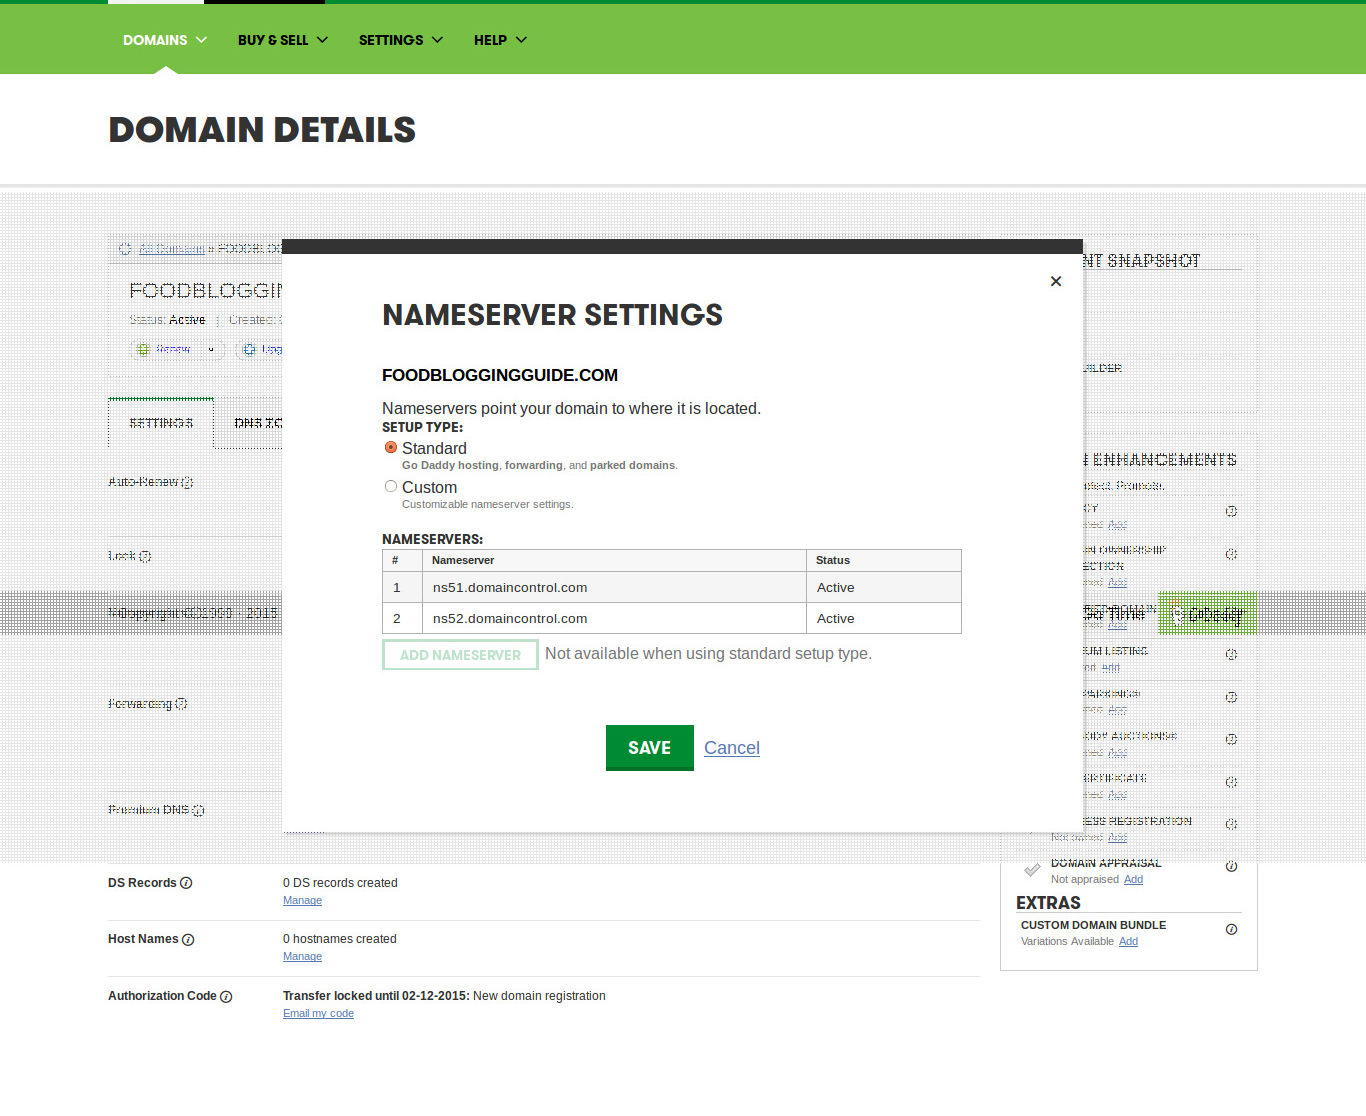
- Choose the Custom Nameserver option from the window, add the name servers provided by your hosting company.
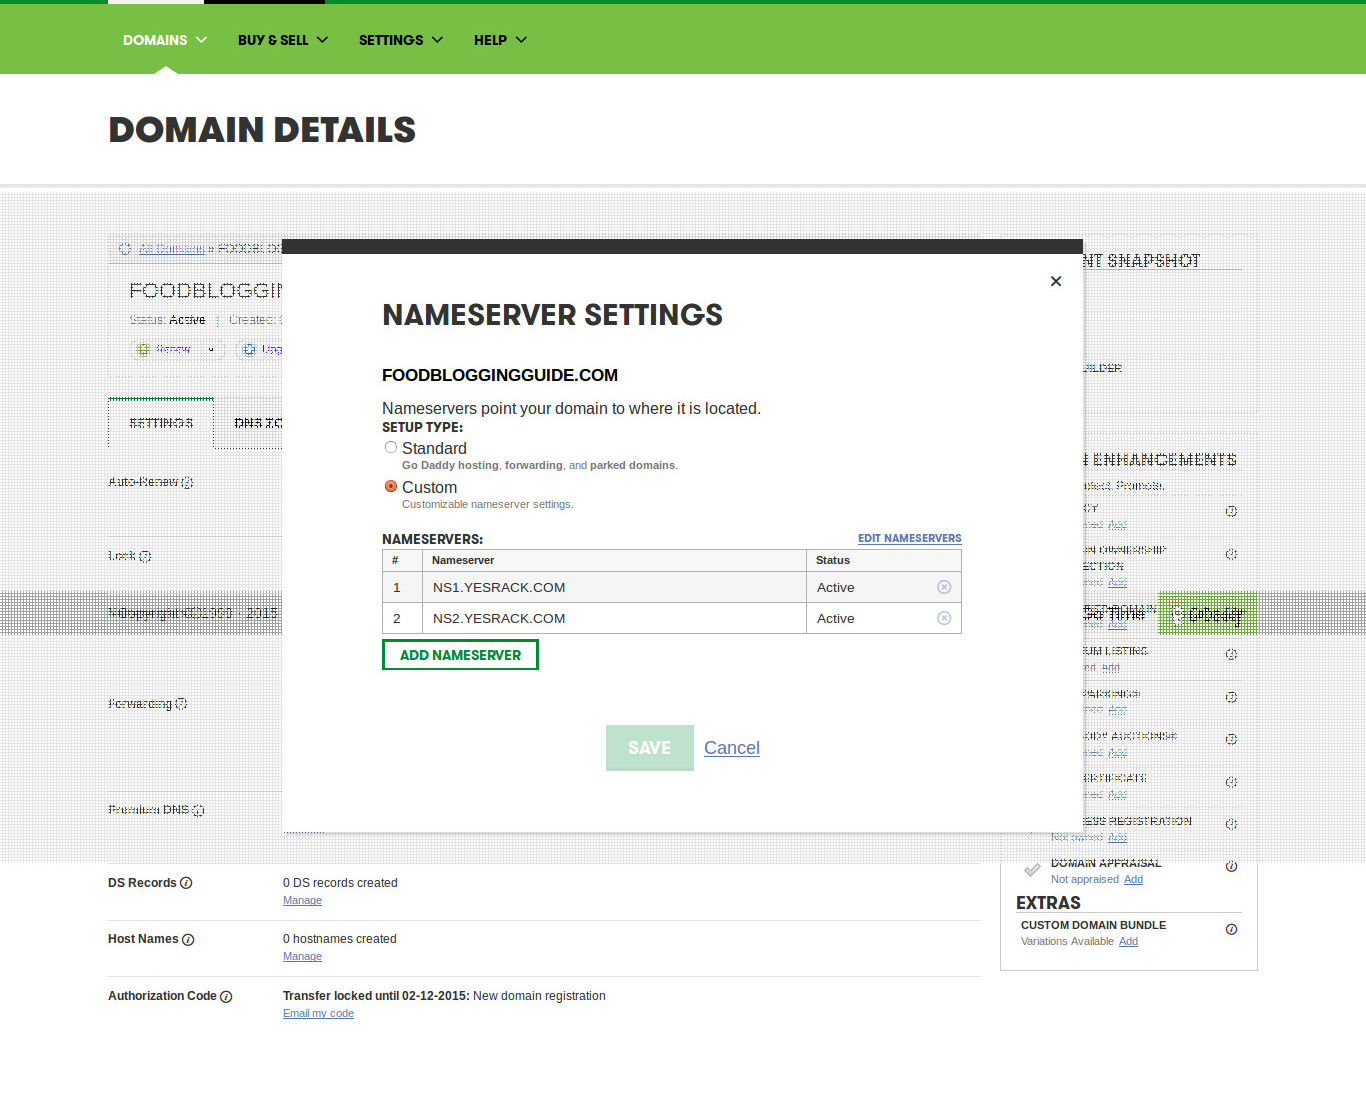
- Save the settings and allow some time for the new detail to get updated globally. Once done, the domain will now point to the correct web server.
Website Design & WordPress Installation Service: ➡ Need help creating your website or blog? We can help you pick the right web hosting, install WordPress blogging system optimally and help you launch your website. Connect with us for WordPress blog installation and web design services.