Once the WordPress blog has been installed, it is time to customize our new food blog. Here we will learn about the must-do changes that should be done to each new WordPress website. We will talk about more WordPress customizations in another article.
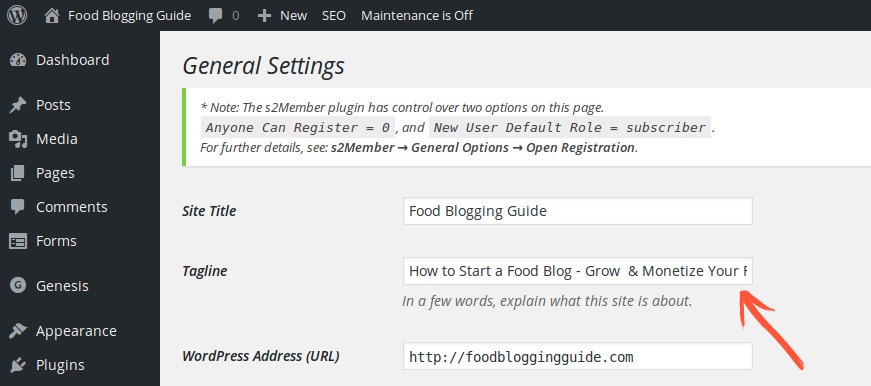
1. Change the website tag line in WordPress
By default, all new WordPress installations have the website tag line set as “Just another WordPress blog”. We don’t want this, right? We can add our own tag line for the website based on our website’s focus and niche.
Eg: Serving hot soups daily; Vegan diets for kids; Low carb diet for fit body; Fit Body, Fit Soul
- Log in to your WordPress Dashboard of your website.
- Go to the Settings page via the Navigation menu in the sidebar.
- Locate the Tagline box and edit it. In a few words, explain what this site is about.
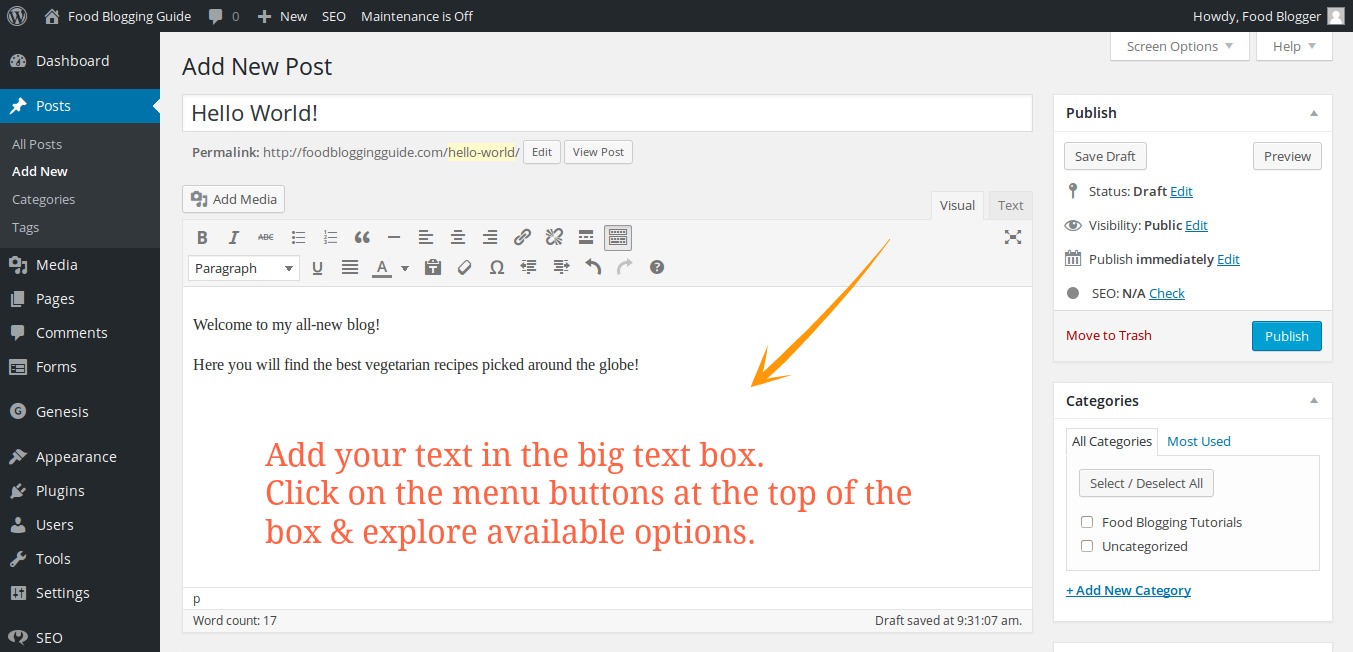
2. Delete the dummy post
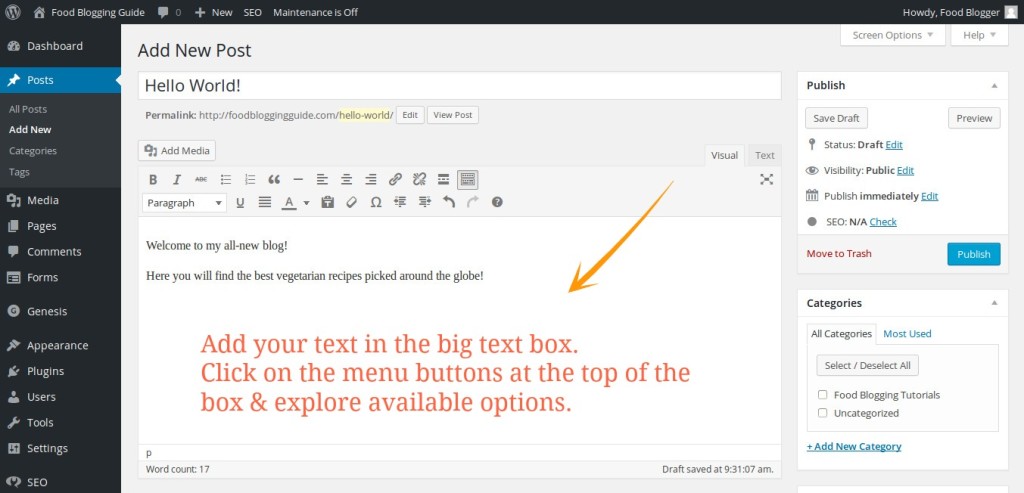
In new WordPress websites, a dummy “Hello World!” post is added to the blog by default to make it easy for new users to understand how things work in WordPress. Delete this post or edit it to suit your website.
- Log in to your WordPress Dashboard of your website.
- Go to Posts → All Posts via the Navigation menu in the sidebar.
- You will find the page that lists all the posts added to the website. As our website is freshly installed, you will find a post with the title “Hello World!“
- When you hover on the title, an editing menu list will appear.
- Move the post to Trash (Delete) or Edit the post.
If the permalink structure has been modified to human-readable pretty links, make sure that you also change the post URL (permalink) slug, which is shown just below the title box.In the URL slug, you should use descriptive words separated by dashes (-). Avoid using words such as “a”, “an”, “the” in the URL permalink slug.
3. Delete the dummy page
In new WordPress websites, a dummy “Sample” page is added to the blog by default to make it easy for new users to understand how things work in WordPress. Delete this post or edit it to suit your website.
- Log in to your WordPress Dashboard of your website.
- Go to Pages → All Pages via the Navigation menu in the sidebar.
- You will find the page that lists all the pages added to the website. As our website is freshly installed, you will find a page with the title “Sample“
- When you hover on the title, an editing menu list will appear.
- Move the page to Trash (Delete) or Edit the page.
- If the permalink structure has been modified to human-readable pretty links, make sure that you also change the post URL (permalink) slug, which is shown just below the title box.In the URL slug, you should use descriptive words separated by dashes (-). Avoid using words such as “a”, “an”, “the” in the URL permalink slug.

4. Permalink settings
By default WordPress uses web URLs (permalinks, or permanent URL links) with question marks and lots of numbers in them. Though these URLs are easy for WordPress and reduces burden on your website server, it is really bad for saerch engine optimization (SEO). Search engines want URLs to be descriptive and human-readable.
Thankfully, WordPress allows us to create a custom URL structure for our permalink URLs and archives. It improves the aesthetics, usability, and forward-compatibility of your links.
- Log in to your WordPress Dashboard of your website.
- Go to Settings → Permalinks via the Navigation menu in the sidebar.
- Set your website permalink to Post name: https://foodbloggingguide.com/sample-post/
- If your website is going to have thousands of posts, you should opt for a custom permalink with Post ID and the title. Type the following in the text box for Custom permalink: %post_id%-%postname%
- Click the Save Changes button.
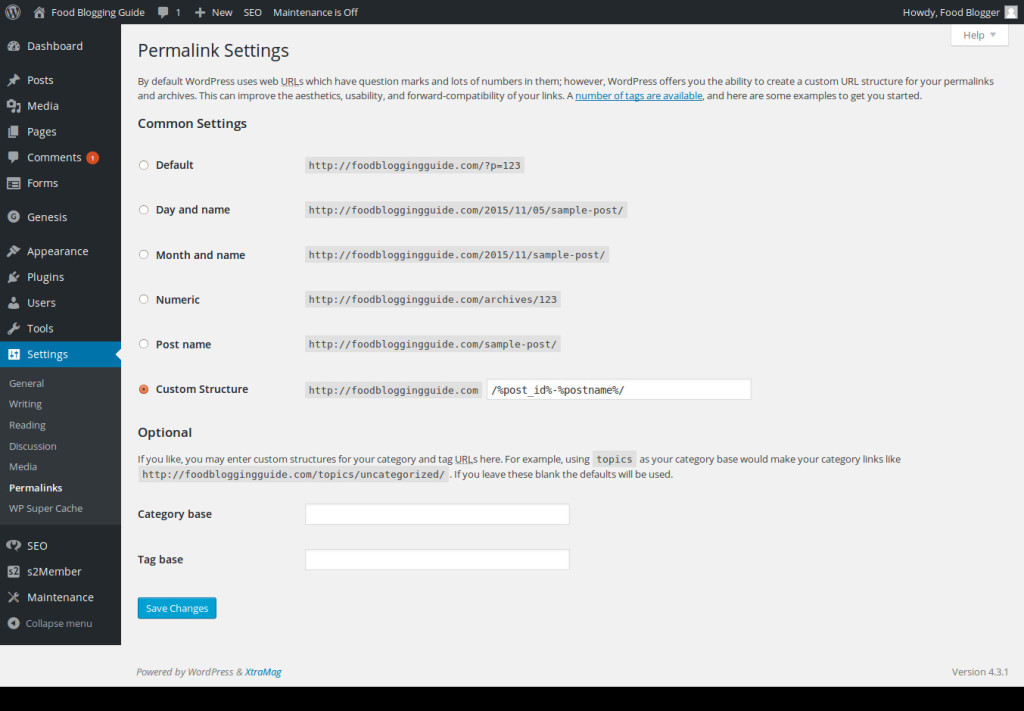
You can also choose custom structures for your category and tag URLs. For example, using topics as your category base would make your category links like https://foodbloggingguide.com/topics/uncategorized/ or https://foodbloggingguide.com/recipes/uncategorized/. If you leave these blank, the defaults are used.
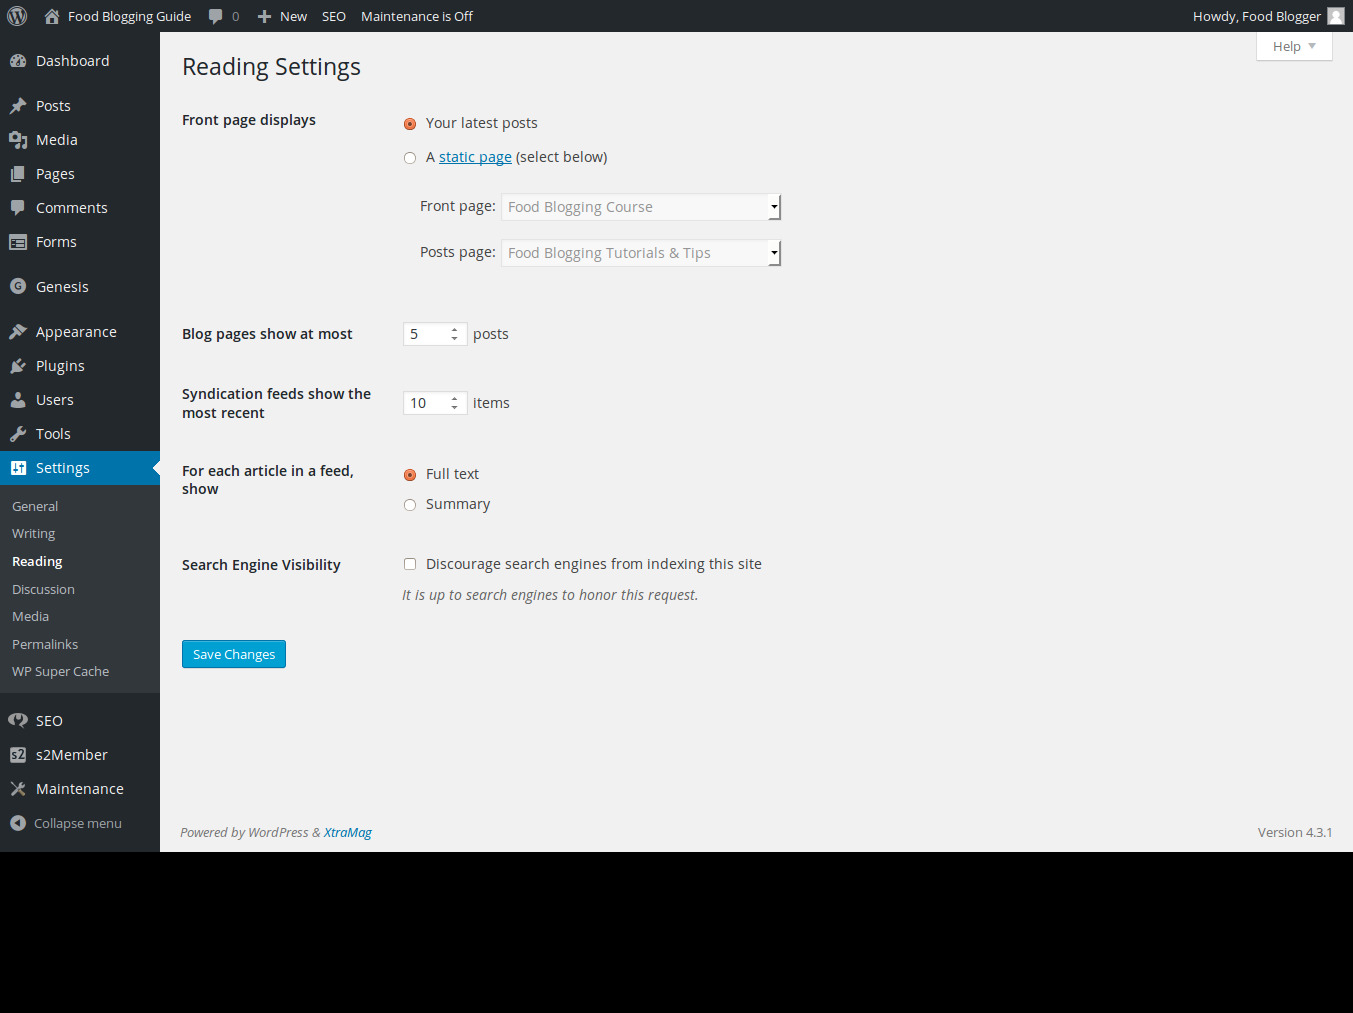
5. Reading settings
You can define the number of posts to be shown on the front page of the blog index or homepage. You can also have a static page as the homepage of your website and use a separate page as your blog page.
- Log in to your WordPress Dashboard of your website.
- Go to Settings → Reading via the Navigation menu in the sidebar.
- Set number of blog posts to be shown on the blog index page.
- Set the number of latest blog posts to be shown in the RSS syndication feed which is available at YourDomainName.com/feed
- Choose whether to show entire blog articles or just summaries of articles in the RSS feeds. (Avoid showing full text in RSS feeds as this discourages people from actually visiting your website.)

- Show a static page as the homepage: You can also use a page as the home page of your website. Eg: Set the “About” page to show at YourDomainName.com. When you choose a static page as the homepage of your WordPress site, the blogs will not be shown in an index page unless you specify one page as the blog index page.
- Show a different blog page: When using a static page as the home page of your website, make sure to create a blank page with a title such as Blog, Articles or something similar to define the bog index page title and URL address. Eg: Set the “Blog” page to show blog posts. In this case, your blogposts become available at YourDomainName.com/blog
Setting media uploads
In WordPress, you can easily add media files such as images, videos, audio, ZIP archive folders, etc. You can upload the image, audio or video while composing the page or post using the Add Media button available above the main text editor (WYSIWIG, What You See Is What You Get).
For better use in websites, WordPress automatically creates three sizes of each image file — thumbnail, medium & large — apart from uploading the original size of the image. When composing the text, you can insert the desired size by selecting it from the Insert Media dialog box that appears when you click on the Add Media button. Upload the image or pick one from the gallery, and scroll down on the right sidebar to find the Attachment Display Settings option. Select the desired image size to insert in the page/post.
You can define the sizes for the different image sizes that WordPress automatically creates.
- Log in to your WordPress Dashboard of your website.
- Go to Settings → Media via the Navigation menu in the sidebar.
- Set sizes (in pixels) of image thumbnails and different versions.
- Check the “Crop thumbnail to exact dimensions (normally thumbnails are proportional” option.
- Check or uncheck the ” Organize my uploads into month- and year-based folders” option.
- I personally use the following image sizes, which also happen to be the default.
- Thumbnail: 150px * 150px
- Medium: 300px * 300px
- Large: 1024px * 1024px
Discussion (comment) settings
By default, WordPress allows visitors to leave comments. You can choose whether to allow comments or not. Also, any website linking to your blog sends a link comment, which is known as trackback. You can choose to enable or disable it as well.
- Log in to your WordPress Dashboard of your website.
- Go to Settings → Discussion via the Navigation menu in the sidebar.
- Choose the options that you want and make other changes.
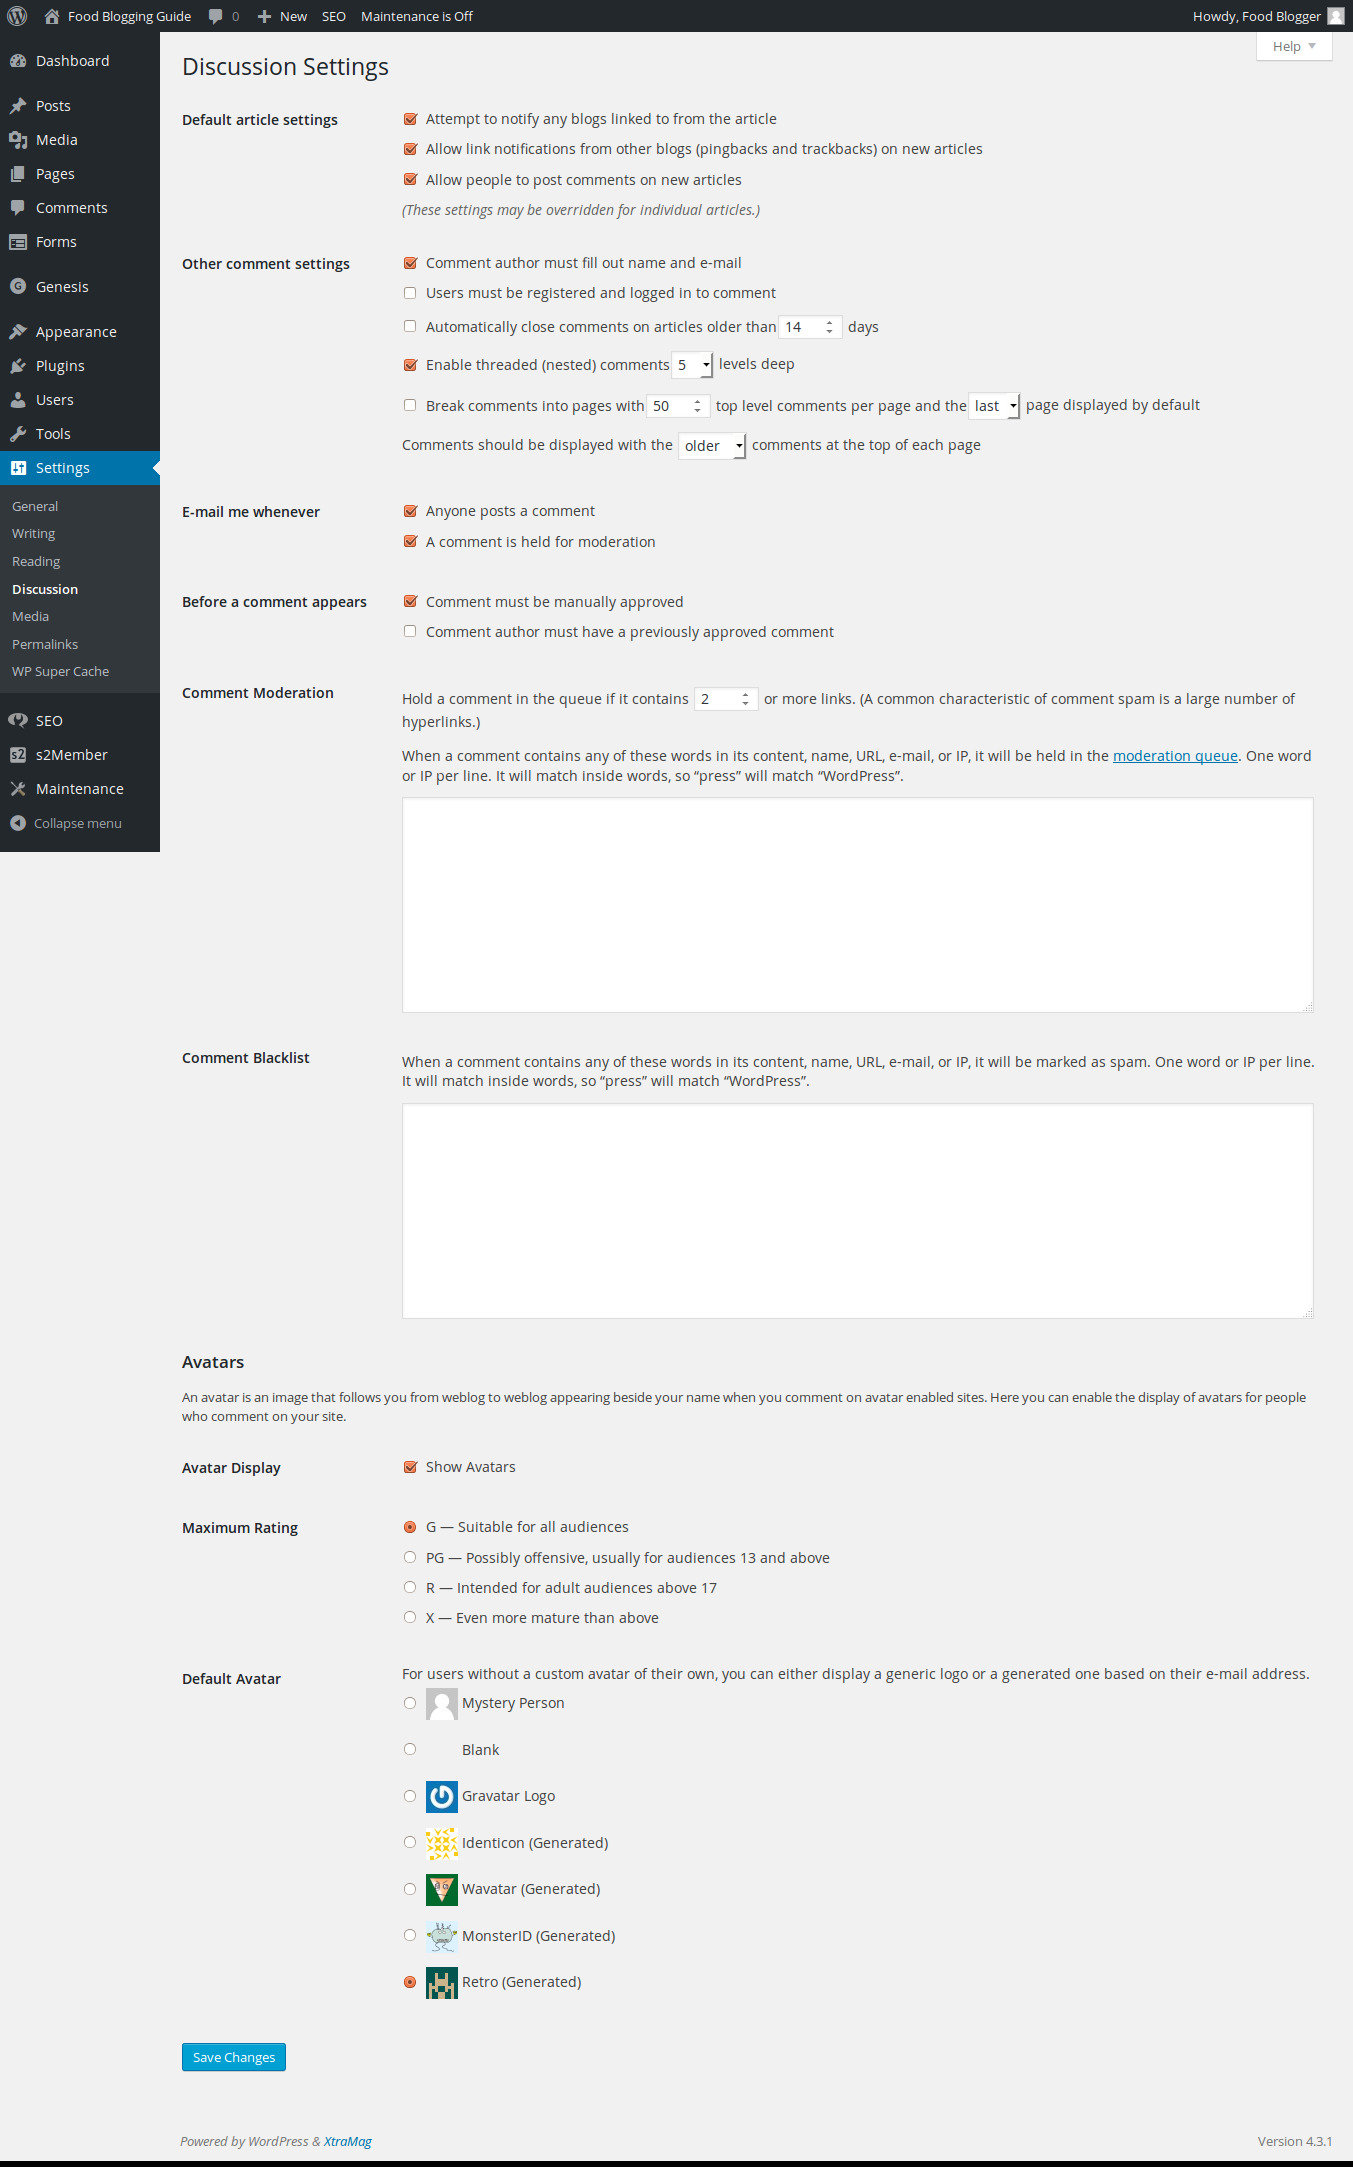
Make your avatars look good
An avatar is an image appearing beside your name when you comment on avatar-enabled sites. By default, WordPress uses Gravatar, or global avatar. When you register with your email address at Gravatar.com and upload an image, it gets associated with your email and appears next to your name on all websites, including WordPress-based sites, that have Gravatar enabled.
- Visit https://en.gravatar.com/
- Register at Gravatar.com/ using the email that you use on your website
- Add a nice image as your profile picture
Here you can enable the display of avatars for people who comment on your site. WordPress uses Change the Avatar for the user comments and authors from the “Mystery Person” to “Identicon”, “Wavatar”, “MonsterID” & “Retro”.
- Log in to your WordPress Dashboard of your website.
- Go to Settings → Discussion via the Navigation menu in the sidebar.
- Scroll down to the Avatar section and locate the Change the Avatar section.
- Change the avatar for the user comments and authors from the “Mystery Person” to “Identicon”, “Wavatar”, “MonsterID” & “Retro” to make it look better than the bland, grey image.
![]()
With these basic changes in place, you are ready to start adding posts and pages to your blog. Make note that posts should be used for adding regular articles and entries, whereas pages should be used for adding more static content such as pages for “About Us”, “Contact”, “Privacy Policy”, etc.
Website Design & WordPress Installation Service: ➡ Need help creating your website or blog? We can help you pick the right web hosting, install WordPress blogging system optimally and help you launch your website. Connect with us for WordPress blog installation and web design services.