WordPress is one of the most popular and easy-to-use blogging software. Most of the blogs and websites on the Internet are powered by this FREE blogging platform.
What is WordPress?
WordPress is a FREE online, open source website creation tool. It is probably the easiest and most powerful blogging and website content management system (or CMS) today. It based on PHP (computer language used by web servers) and MySQL (database for storing information).
What is open source software? When the developer of an application chooses to let others have the freedom to use, modify and sell the software, it is distributed (free or sold) with the open-source license such as GNU General Public License. When you download WordPress (and WordPress themes such as Genesis) that come licensed as GNU GPL, you get the freedom to modify, share, distribute or resell the package without any restriction as long as you keep the copyright statements intact.
Self-hosted WordPress website
You might be familiar with WordPress.com, which allows you to create an blogging account. We are not interested in the WordPress.com service. For best control and performance, we will install and use the WordPress blogging software on our own web hosting, instead of using their service. With a self-hosted WordPress blog, you have complete ownership and control of the website and its content. You can have it customized to your desire.
In this tutorial, we will learn how to install WordPress on our web hosting account.
BLUEHOST WEB HOSTING OFFER: I recommend BlueHost.com for web hosting space. Their service is robust and fairly priced. Installing WordPress on your websites, and managing them is also super easy. You get FREE SSL which allows your website to run on HTTPS web address (green padlock in browser).
Installing WordPress on BlueHost
- Log in to your Bluehost Hosting account.
- Open the My Sites tab from the side menu on the left.
- Click on the Create Site button.
- Enter the Site Name and Site Tagline for your blog.
- Click Next.
- Select the domain you wish to install to from the drop-down list.
- Choose the directory this should be installed to, and click Next. For us, it should be the main folder (selected by default).
Make sure that you install and run your website on HTTPS website address. Simply put, it helps in ranking in search engines such as Google.
Manually installing WordPress
- Download the latest version of WordPress from WordPress.org.
- Extract & upload those files to our web server, using FTP
- Create a MySQL database and user for WordPress
- Configure WordPress to connect to our newly-created database
- Complete the installation and setup our new website
Need more detailed instructions? Check out the WordPress Codex.
Step 1: Download the WordPress installation package
Go to WordPress.org’s official download page and download the latest version of WordPress. Please download the .ZIP version of the installation package.
Click on the Download button for the latest WordPress version and save the installation package at your desired location. If you are using a browser such as Google Chrome, the installation package will be saved automatically to your hard disk’s default Download folder. Locate the installation package that you’ve just downloaded.
Right-click on the installation .ZIP archive folder and choose the Extract option. This will decompress the archive folder and extract the contents of the ZIP archive. You will now find a folder named “WordPress” in the folder same as the archive file or in the folder chosen as the destination for extracting the archive.
Step 2: Upload the WordPress files to your server
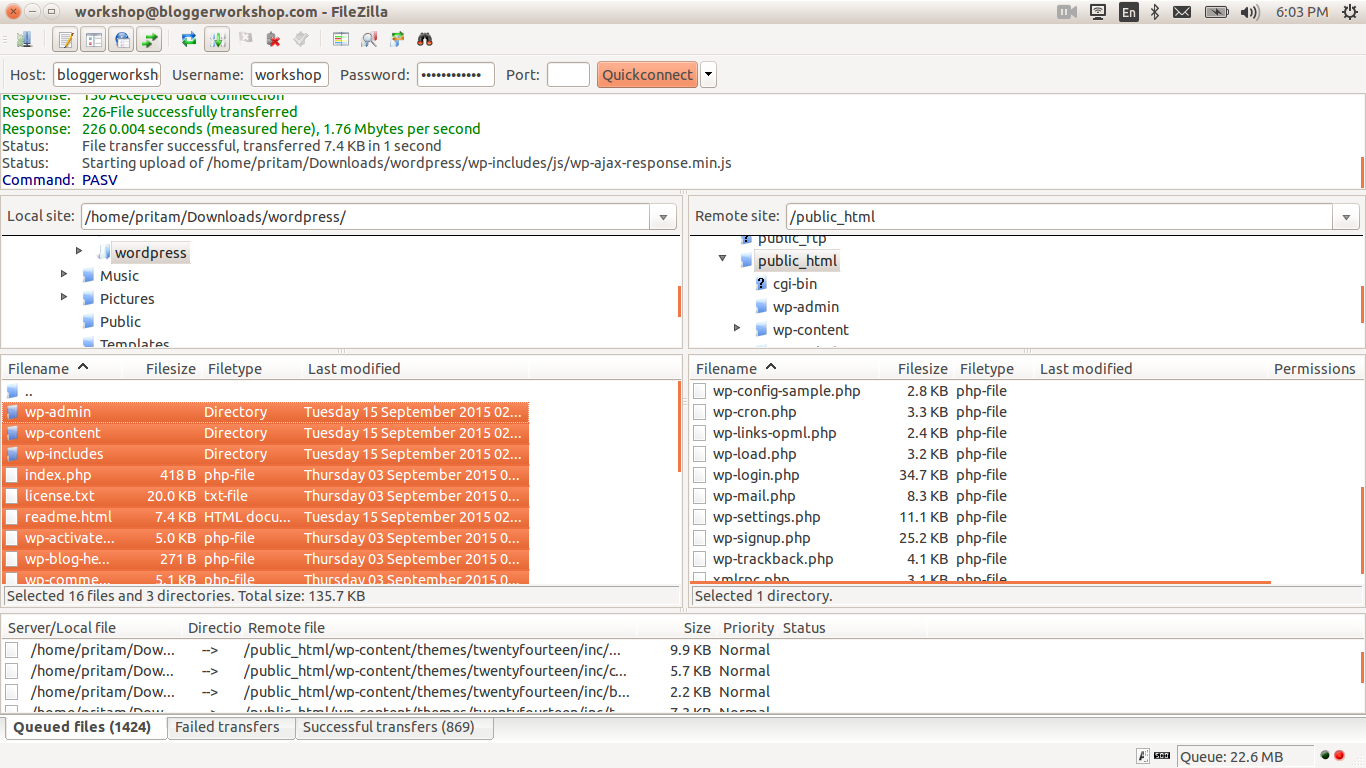
The next step is to upload the extracted files and folders to our web server. The easiest way to upload the installation files is via FTP (File Transfer Protocol) using client applications such as FileZilla (free & recommended). If you don’t have FileZilla installed on your computer, do it now. If you have any other FTP client installed on your computer, you are ready to go.
Important: We want our WordPress-powered food blog to be available and accessible through our main domain (i.e. www.YourDomainName.com or http://YourDomainName.com). So, we need to upload the files inside the extracted WordPress folder to the public_html folder on our web hosting server.
We can upload the WordPress installation files to your web hosting account via FTP using an FTP client application like Filezilla or via cPanel -> File Manager -> Upload file(s).
Option 1: Using FileZilla FTP client for uploading files
- Download and install FileZilla FTP client application on your computer.
- Use the FTP credentials (see below) to connect FileZilla with your server using the Quick Connect option.
- In the Remote Site pane of FileZilla, make sure to select and browse to the public_html folder.
- In the Local Site pane, browse to the “wordpress” folder that was extracted from the ZIP archive.
- Select all the folders and files in the “wordpress” folder on your local machine and upload it. You can select all the local files & folders, and drag-drop them in the Remote Site pane of FileZilla to begin upload. Alternatively, select all the files & folders, right-click to open the dialog box and select “Upload”.
- As the number of files are huge, you will have to wait a bit for the upload to complete.
FTP Settings and Connection
The following FTP login information can be found in the web hosting welcome email for your new hosting account. Your FTP username and password are the same as your login username and password credentials for cPanel.
- FTP Host/Address: (Website IP address or your domain name eg: YourDomainName.com)
- FTP User: (cPanel/FTP Username)
- FTP Password: (cPanel/FTP Password)
- Port: 21
- Path/directory: (public_html, or leave blank)
Option 2: Upload files using File Manager
If you want, you can upload files using cPanel.
When using cPanel to upload files & folders, it is important to have the entire content compressed and archived in a single ZIP file. The cPanel File Manager has a tool that can decompress or “Extract” the ZIP archive folders. Once the ZIP archive is uploaded, select the ZIP folder and then click on the Extract icon on the top to get the desired files and folders uploaded to web server quickly.
Using a ZIP folder allows us to overcome one of the major limitation here is that you will not be able to upload folders. Each file will have to be uploaded individually and all folders will have to be created manually.
For transferring WordPress files and folders to our web server, we will use the original WordPress ZIP archive file rather than the extracted files.
To upload a file through cPanel’s File Manager, please do the following:
- Login to cPanel.
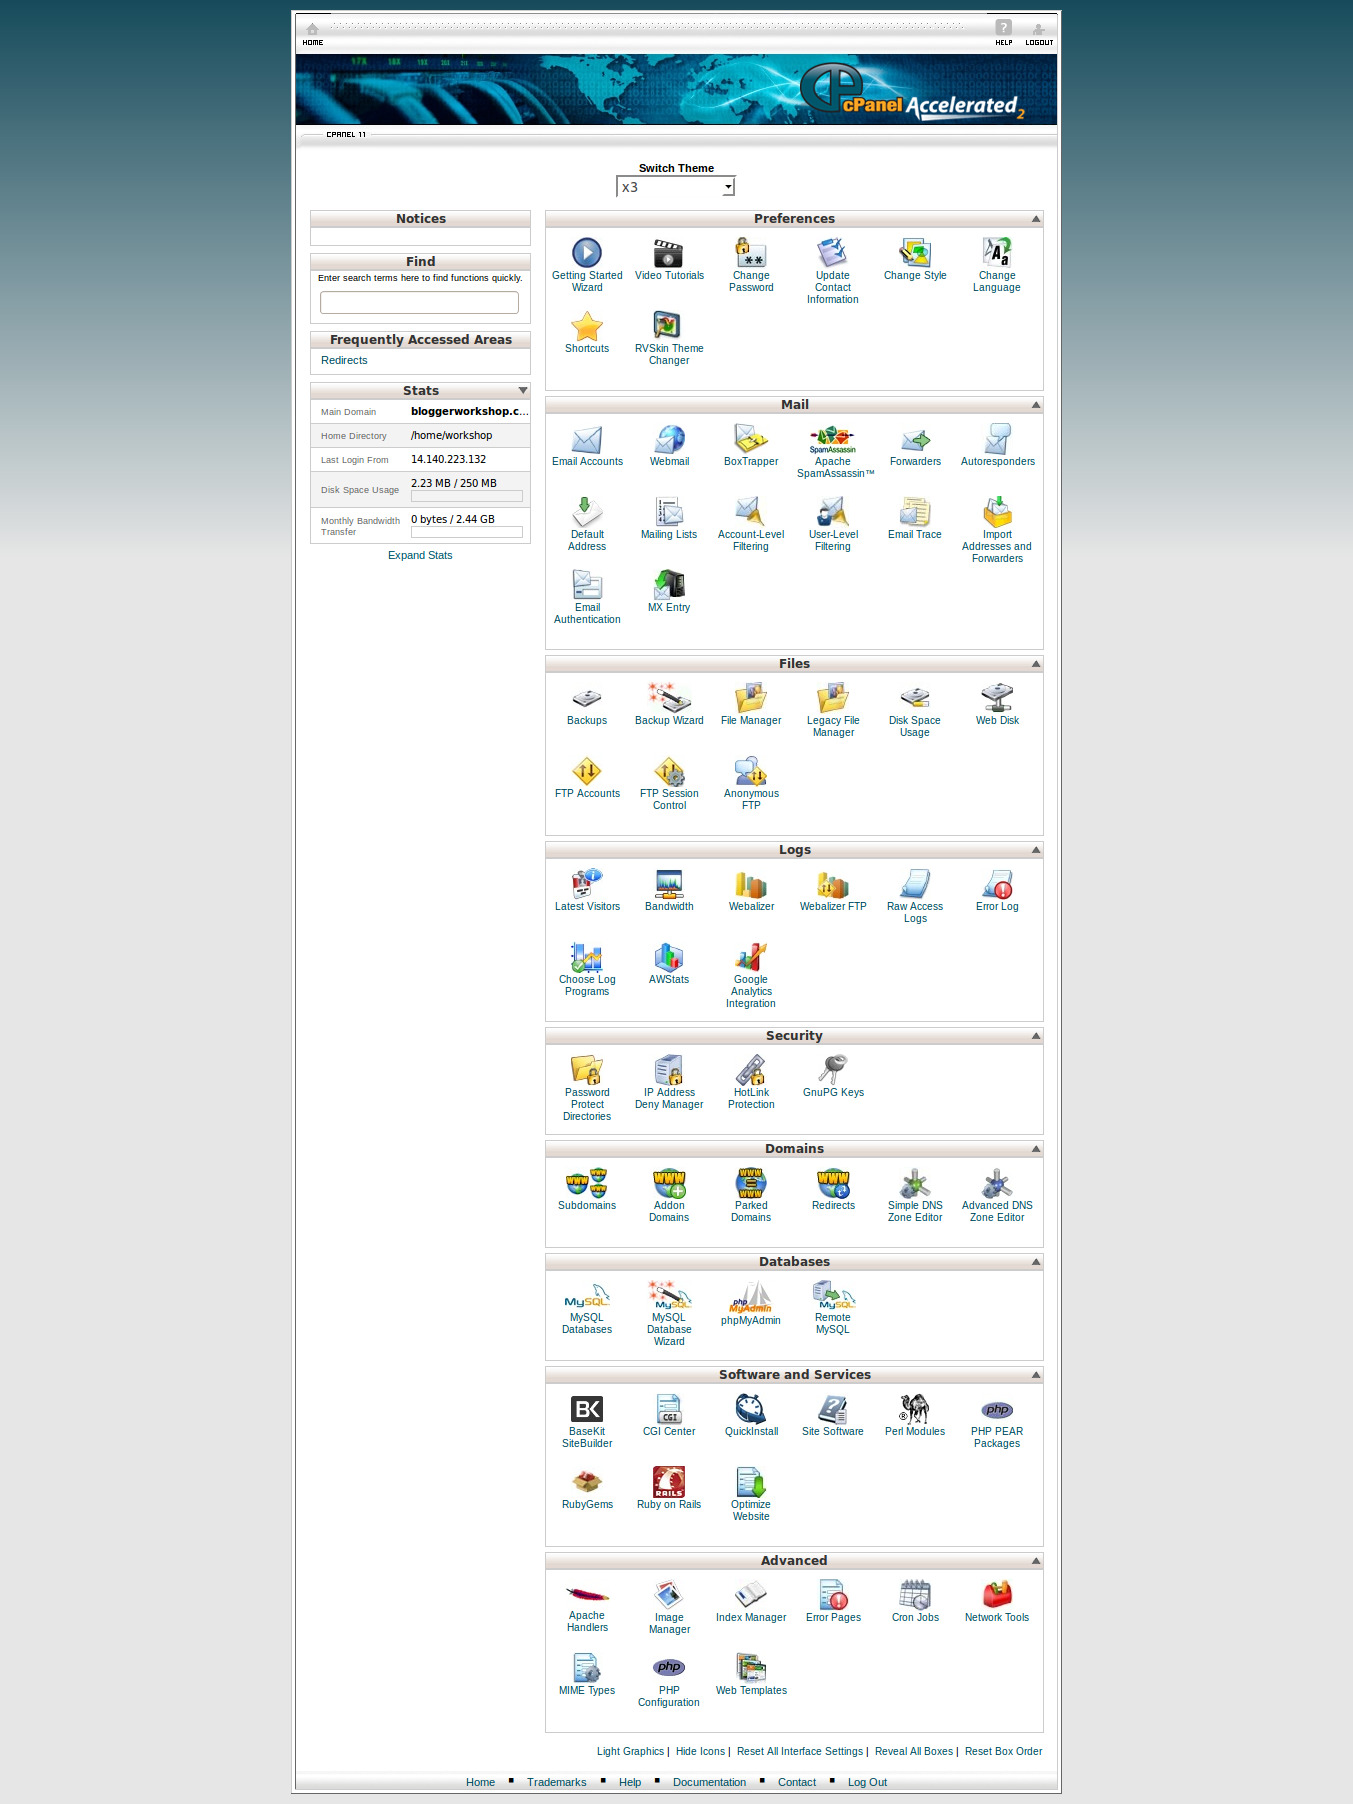
- Under Files, click File Manager.
- Select Web Root and Show Hidden Files, then click Go.
- Click to open the folder to which you’d like to upload files.
- Click Upload from the top toolbar.
- Click on the Browse button (some web browsers will have the Choose File button instead).
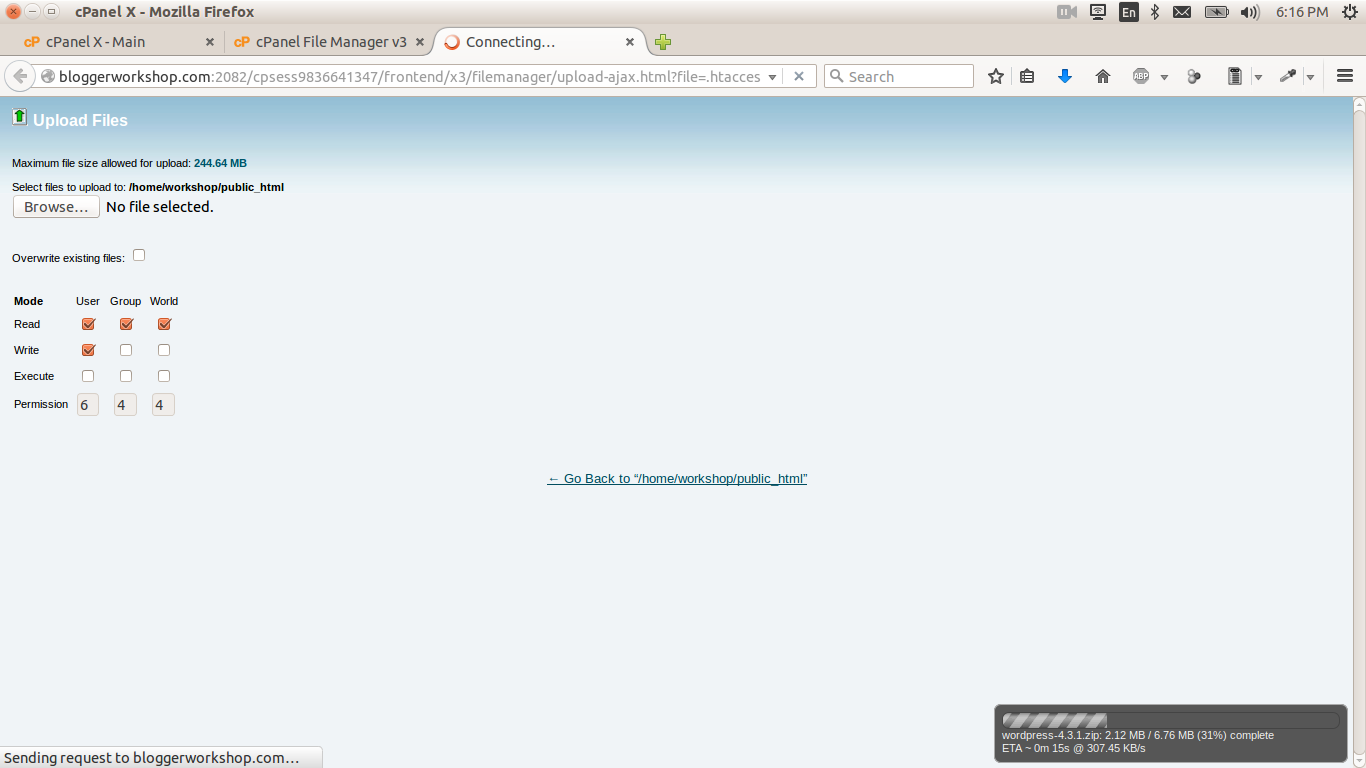
- Select the file (the WordPress ZIP archive) on your computer that you want to upload.
- Once the file has been selected, the file upload will begin automatically.
- You can select additional files while uploads are in progress.
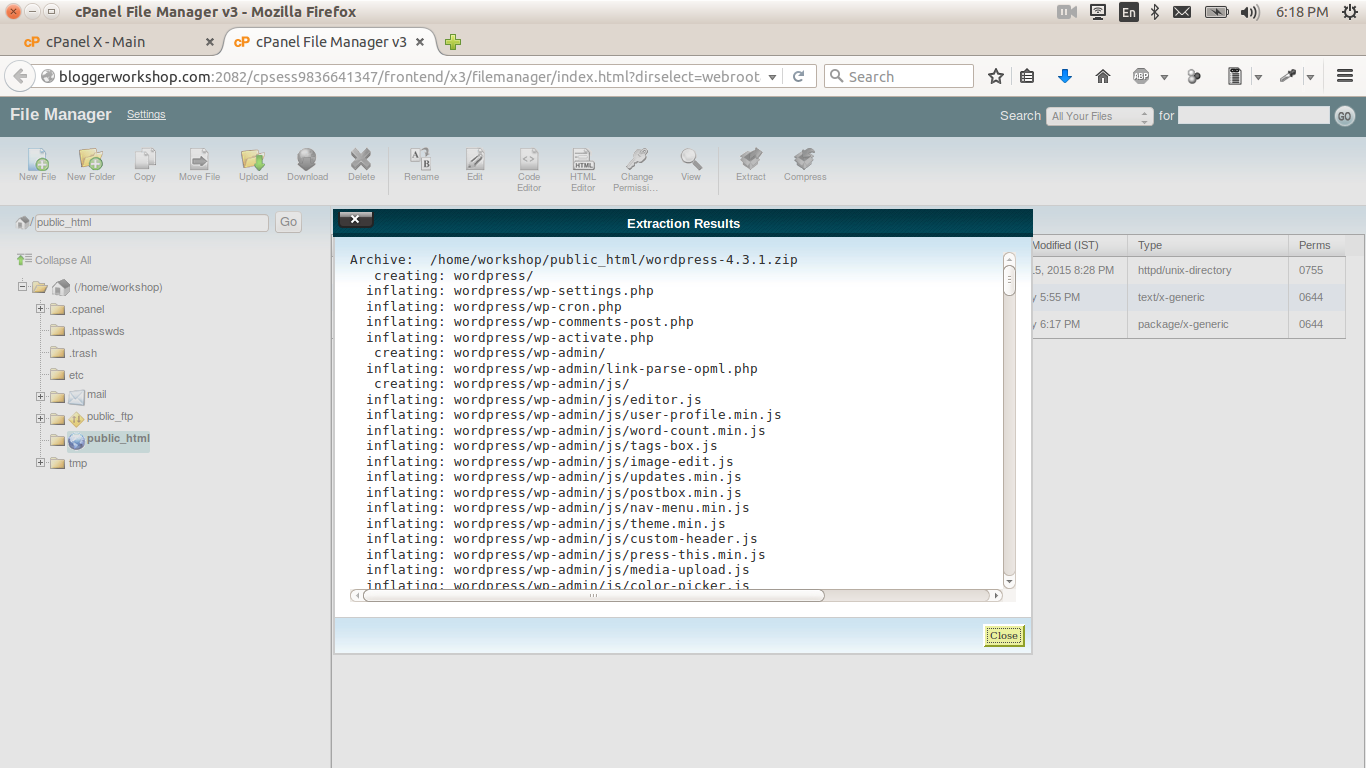
To extract the WordPress ZIP file in cPanle File Manager, follow these steps:
- Once the ZIP file is uploaded, refresh the File Manager window to show the ZIP folder.
- Select it and then look the Extract button at the top. You can find the Extract option also by right-clicking on the ZIP archive in File Manager.
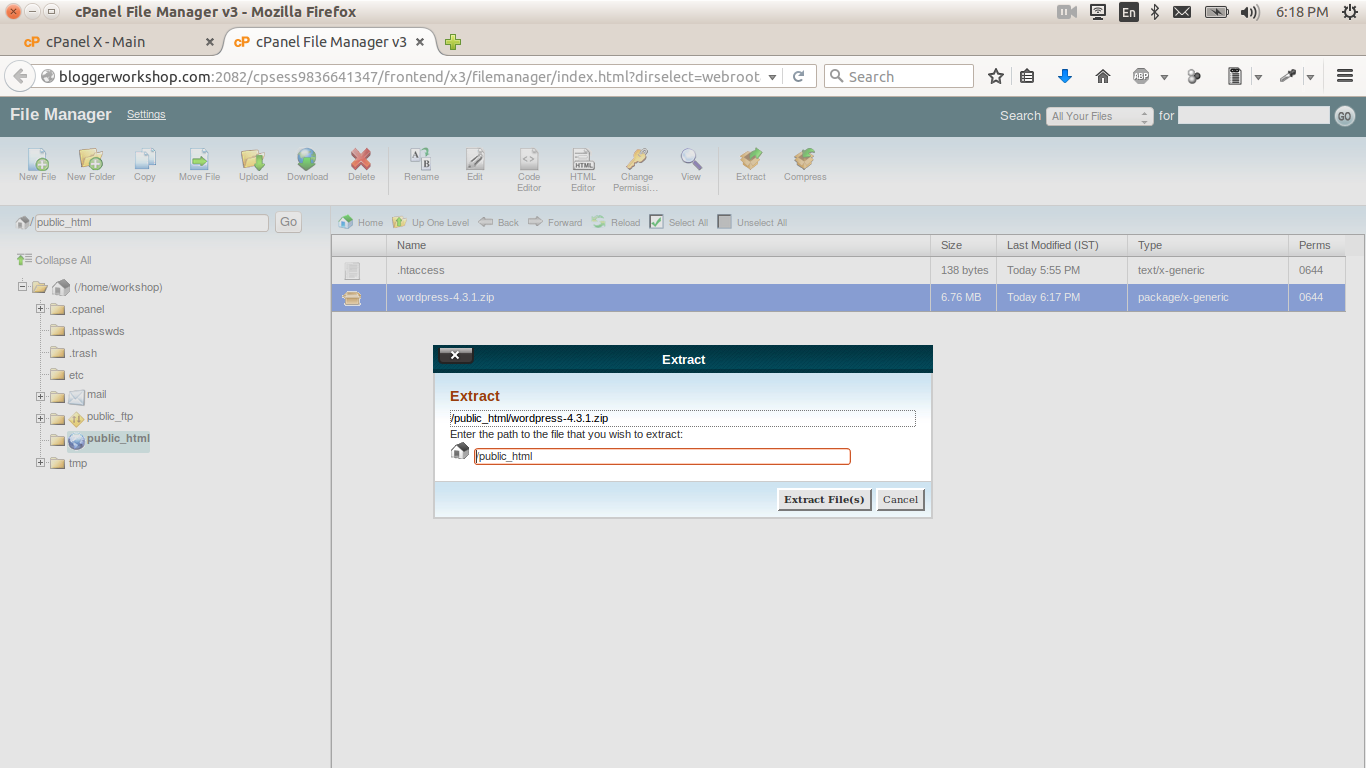
- Extract the ZIP archive to get the original “wordpress” folder inside the public_html folder.
- Right now, the WordPress files are present in a sub-folder of our domain. It can be accessed only via YourDomainName.com/wordpress. To install WordPress on YourDomainName.com, we need to move the files & folders of the “wordpress” folder to the main folder — public_html.
- Browse inside the “wordpress” folder that was created on the ZIP file being extracted.
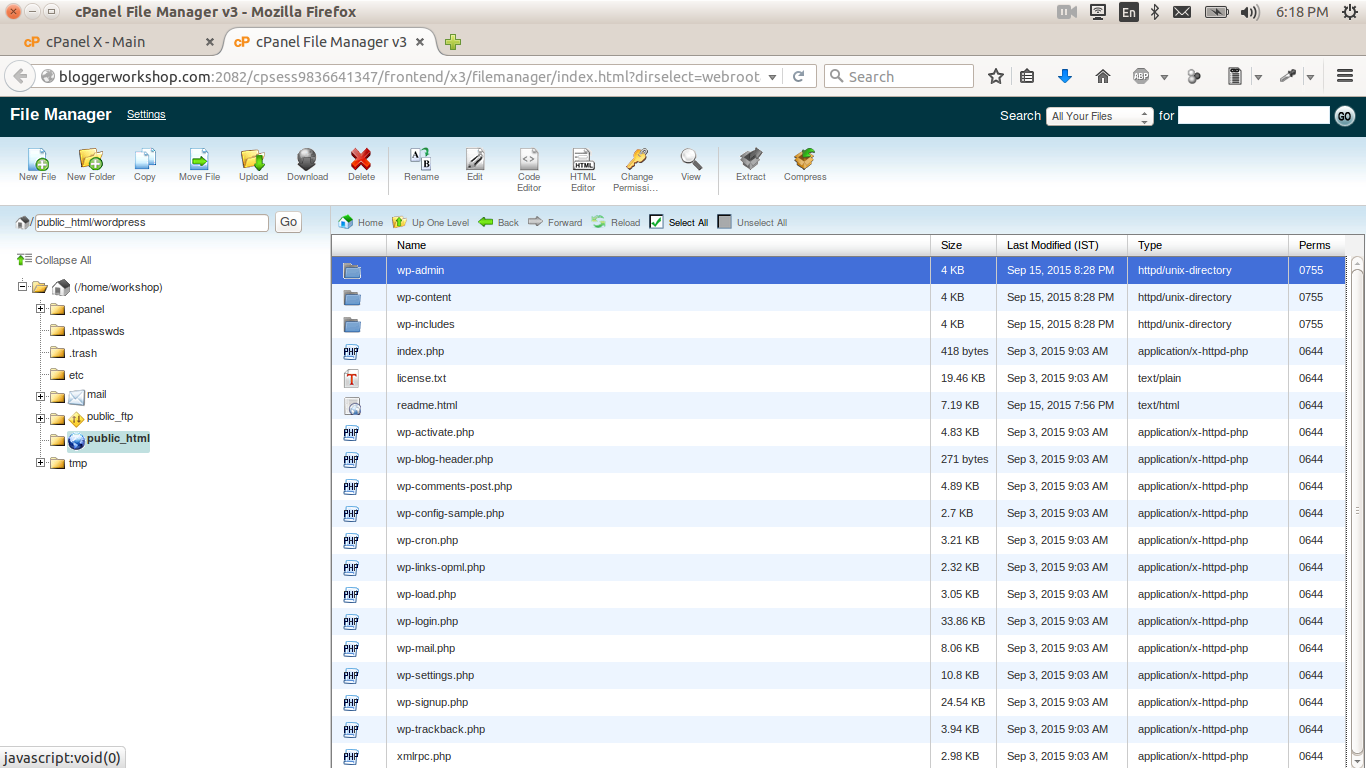
- Select all the files and folders here by clicking on the “Select All” option above the list of files/folders.
- Click on the “Move File” icon at the top.
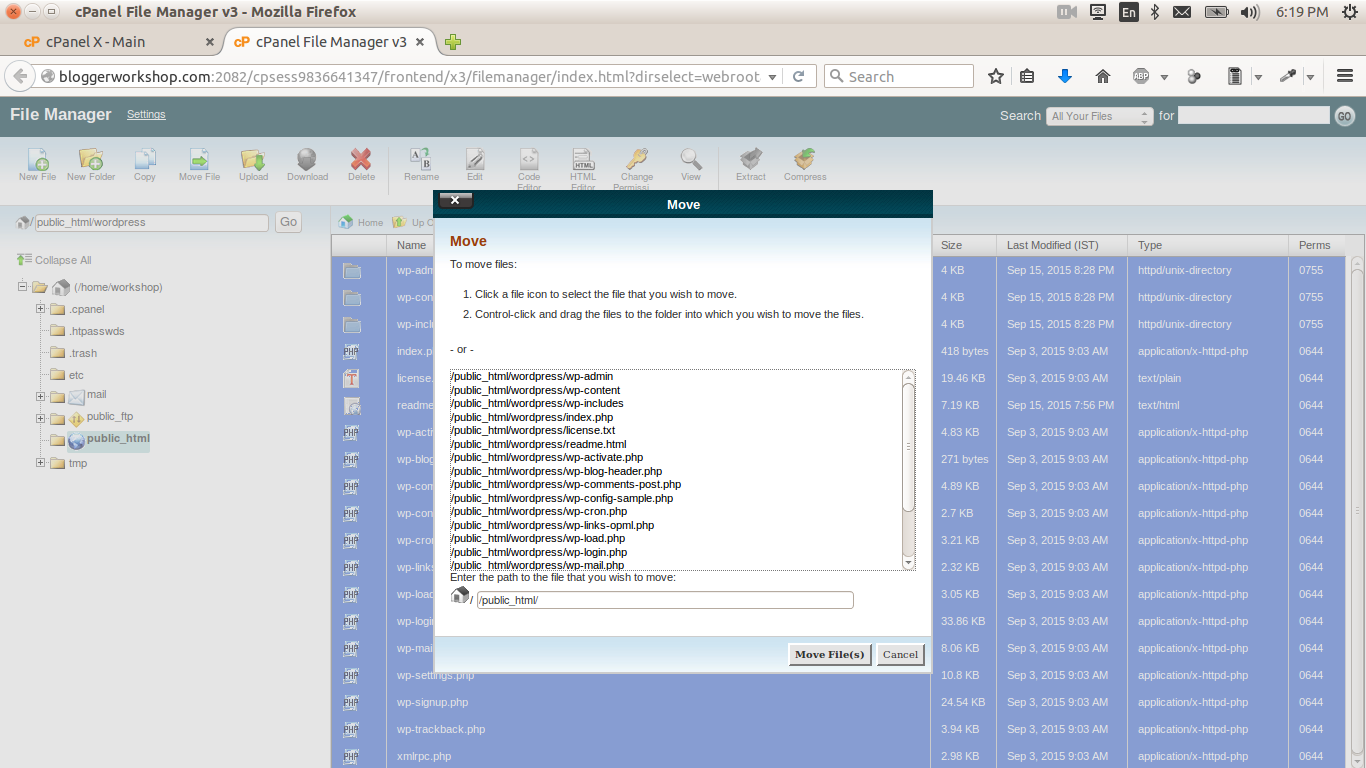
- In the pop-up window, you need to define the destination folder. By default, the destination folder is set to same as the existing location.
- Right now, the destination folder would be “public_html/wordpress” by default. Delete the word “wordpress” from destination so that the files and folders are moved to the “public_html” folder.
- Browse back to the main public_html folder and delete the empty “wordpress” folder.
Step 3: Create a MySQL Database for WordPress
As WordPress is a dynamic website management system, all the posts, articles and text-based data is stored in a database. Files are saved separately in designated folders inside the wp-content folder.
So, we need to create a MySQL database and assign a database user to it with full permissions for our WordPress blog.
- Log into cPanel.
- In the Databases section, click the MySQL Database Wizard icon.
- For Step 1: Create A Database, enter the database name and click Next Step.
- For Step 2: Create Database Users, enter the database user name and password and click Create User.
- For Step 3: Add User to the Database, click the All Privileges checkbox and click Next Step.
- For Step 4: Complete the task, save the database name, username and password for later.
Step 4: Run WordPress installation wizard
Installing WordPress is very simple. Once we have uploaded WordPress in to the public_html directory, just go to http://YourDomainName.com in your Internet browser to open up the Installation Wizard.
If you are using Bluehost web hosting, or if you have SSL installed on your website, use the secure HTTPS version of your website address. So, instead of visiting http://YourDomainName.com, go to https://YourDomainName.com. By doing so, your website will run on the secure SSL website URL. This helps in search ranking (Google, Bing).
If you want to use http://www.YourDomainName.com rather than http://YourDomainName.com, make sure that you first access the website and run the installation wizard on the same URL. We recommend avoiding the URL with www. You should redirect the www URL for your domain to the non-www URL using the Redirections settings in cPanel.
Just follow the instructions and you are good to go.
- Enter the details (database name, database user, database user password) for your newly created MySQL database and click the Sumbit button. If your settings are correct, you will see a confirmation screen.
- Press the Run the Install button to proceed.
- Enter the website title, administrator username and email, choose password (auto-generated). Keep your username anything but admin for safety purpose. For the email, it is recommended to use a custom domain email such as info@yourdomainname.com or contact@yourdomainname.com. (You can learn how to create custom domain emails in previous tutorials.) Make sure to use a real, functional email address as it is used to regenerate password if you forget it. Also, it is the default email for notifications and contact forms.
- On this screen, you can specify whether you want search engines such as Google & Bing to index your site or not. Keep it selected. Uncheck it only if you site is not going to be ready anytime soon.
- As soon as you press the Install WordPress button, your WordPress blog is ready.
- Browse to https://YourDomainName.com/wp-admin/ to access the back-end control dashboard to manage your new blog.
Make sure that you do not leave the new WordPress installation with the default settings. Change the website tag line to reflect the real purpose of your website/blog (which is set to Just another WordPress site by default) & delete the dummy post & page that comes with new WordPress installation. If search engines discover your new website before you make these changes, your website will have incorrect listing in Google/Bing for a while.
Website Design & WordPress Installation Service: ➡ Need help creating your website or blog? We can help you pick the right web hosting, install WordPress blogging system optimally and help you launch your website. Connect with us for WordPress blog installation and web design services.